Give A Model Makeover In Photoshop
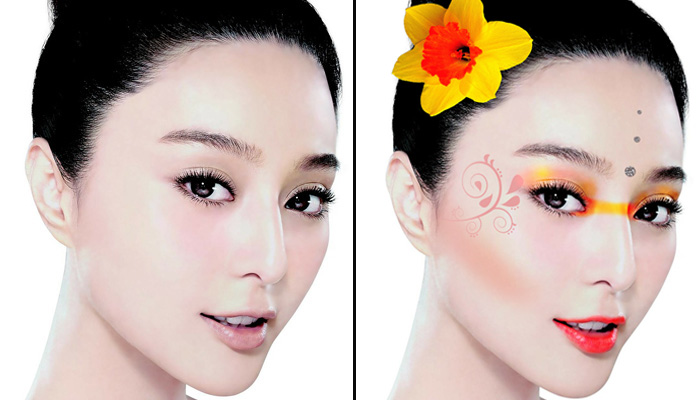
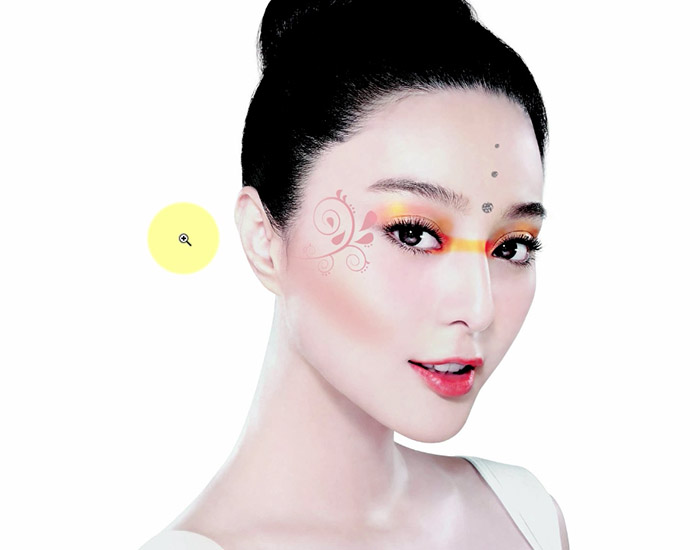
Here’s a before and after preview of this step-by-step Photoshop tutorial.
The model (download the 1920 x 1382 size): http://pixabay.com/en/girl-portrait-female-model-healthy-84644/
The Flower: (download the 1920 x 1660 size) http://pixabay.com/en/daffodil-flower-spring-292284/
The Tattoo Design: (download the 1920 x 1693 size) http://pixabay.com/en/scroll-fleur-de-lis-tattoo-design-309100/
The Gem: (download the 1280 x 857 size) http://pixabay.com/en/diamond-gem-cubic-zirconia-jewel-123338/
I suggest downloading all of the files at the same time so that you can have them handy when you need them. At the time of this tutorial, Pixabay doesn’t require you to sign in to download their files. As long as you can pass their Captcha, you’re good.
Starting Off With Lipstick
Go ahead and open the female model file.
Let’s start with her lips, since that will be the easiest thing to do. It also gives us instant gratification, which never hurts. 🙂
Let’s add a new layer from the Layers Palette. If you don’t see the Layers Palette, go to the Windows menu at the top of your workspace, and select Layers from the drop down menu. Once you have your new layer, set its blending mode to Overlay (you could also use Color, which adds color in a bit more softly).
The nice thing is that because the model is a lighter skin tone, the Overlay mode can be very forgiving if you accidentally paint outside of her lips. Select the Brush Tool (shortcut B), and then select the color #ff0000 for your foreground. . Set your Brush Opacity and Flow to 50%, and set its size to 20, and the Hardness to its softest setting, 0%.
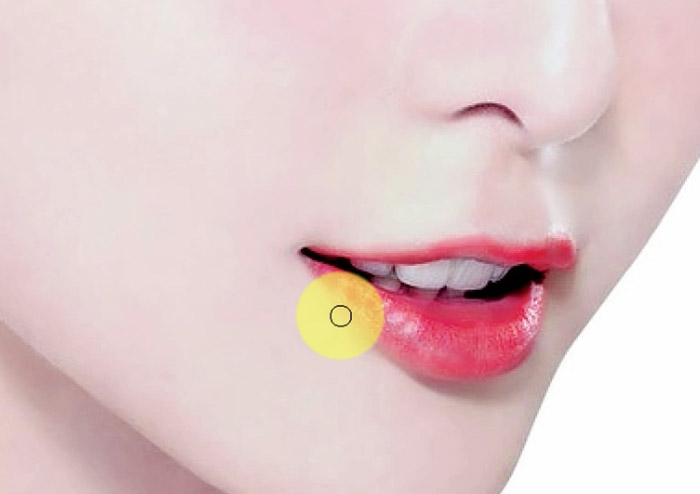
Now is a good time to zoom in to to 200% so that we can see what we’re doing. Go in there and lightly brush color on her lips. You can go over it multiple times until you get the desired deep red you want. If you make a mistake, simply select the Eraser tool (E), put it on a soft setting, and erase your mistake.
It’s Eye Shadow Time
Let’s make another layer. Click and drag it on top of the other layers if you need to, and name it Eye Shadow. Set the blending mode to Vivid light.
Now we need to decide what color to start with for her eyelids. Let’s add a somewhat natural shade first. With the Eye Dropper tool, select the darkest existing shade on the top of her eye (with the Brush tool selected, hold down the Option/Alt on a Mac to make the eye dropper appear. Select your color). Then, within the color picker, select a slightly darker color to work with, preferably similar to #936259. This will be the first color you use.
With the Brush tool set to 40px, softly apply the new color to the tops of her eyelids. The effect should be noticeable, but still natural.
Let’s Get A Bit Wild Now
This looks nice, but of course we can’t leave it the way it is. Let’s have some fun with the colors we add to her face.
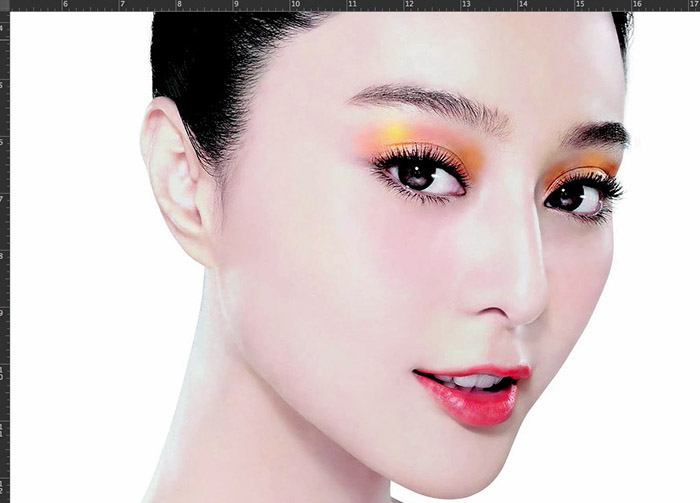
With the Eye Shadow layer selected, set your Brush back to 40px, and add touches of bronze (864525) on top of the existing color, to the area of eyelid closest to her nose.
Next, let’s add some yellow to make it pop. Select the color cd9f12 (yellow touches to make it pop), and set the Brush size to 35px. The Opacity and Flow should still be 50%.
Contouring Her Cheek
Create a new layer, and name it Cheek Contouring. Set the Blending Mode to Hard Light. With the Brush tool, make sure the Opacity and Flow are still set at 50%, and the brush size is 100px. Softly paint contours on her cheeks with the color 936259. One good stroke from her ear towards her nose will do the trick. . Then, click in the center once to bring out her check bone a bit more.
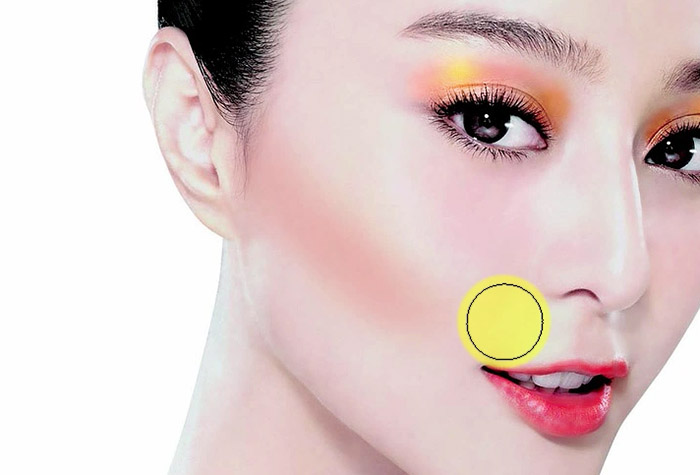
Adding Color Across Her Nose
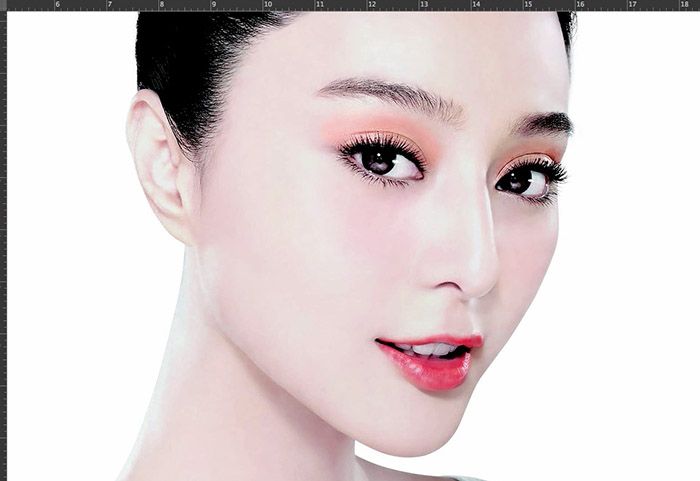
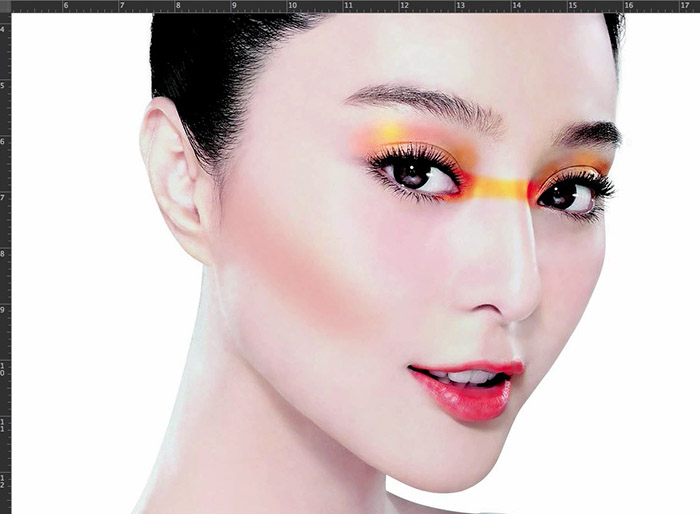
Create a new layer called Color Across Nose, which is exactly what we’re going to do. Set the Blending Mode to Vivid Light. Select the Brush tool, size it to 30px, set the hardness to 35%, and set the foreground color to #d14304. Give her one good swipe across the eyes, and you’ll see that the color transitions from red to yellow on its own. Touch it up as necessary, and use the Erase tool to take out any areas you don’t like.
Adding The Swirl Tattoo
Open the Swirl Tattoo file (scroll-309100.png) . Extracting it using Magic Wand tool. The clean lines make it simple and easy.
Click and drag the Tattoo file onto your main model file, and name it Tattoo. Depending on the size that you downloaded, you may need to size the graphic down. If you need to, press Command + T + Shift (Control + T + Shift) and drag one of the corners inward to reduce its size while preserving the graphic’s uniformity. Click and drag it next to her eye, and rotate it to the angle you see below.
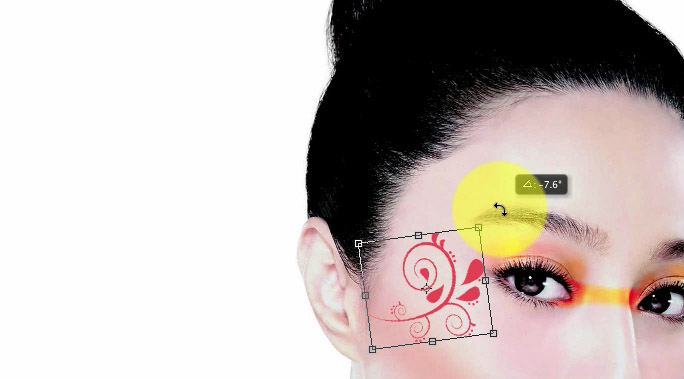
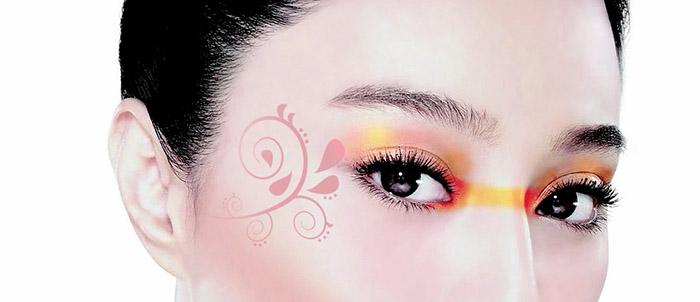
Set the layer Blending mode to Pin Light. The curve of the tattoo fits in well with the angle of her face.
Select your Eraser Tool (E) and set the hardness to 0%, and the Opacity and Flow of the Eraser to around 50-60%. Lightly go in and erase the left ends of the tattoo graphic in order to give it some depth. This should be super subtle.
It’s Time For Diamond Bling
Open the diamond file. Extract the diamond using the Quick Selection tool. If you select too much, hold down the option/alt key to deselect those areas.

Then, head up to Select in your top menu, and click Inverse. This will reverse your selection and select only the diamond instead of the area around it.
Click and drag the diamond over to the main model file, and place it between her eyebrows. Bring the opacity of the layer down to 65%. Name it diamond.
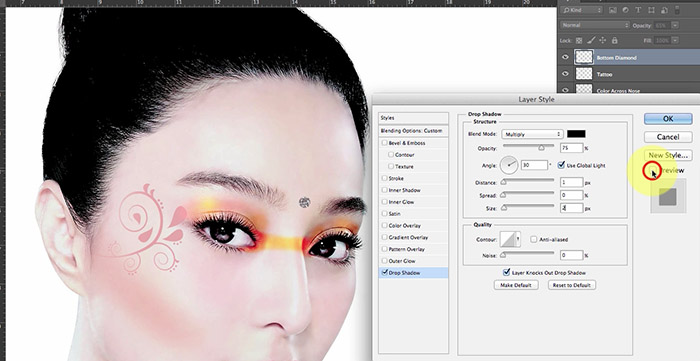
Now let’s add a slight shadow to it. Double click next to the Layer Name to bring up the Layer Style Menu. Select Drop Shadow, use the following values:
Opacity: 75%
Distance: 1
Spread: 0
Size: 2
Duplicate this layer by holding down the option/alt key, and place it above the existing diamond. Size it slightly smaller by pressing Command + T + Shift. Name it diamond 2.
Duplicate this layer as well. Size it down again. Name it diamond 3.
The Final Touch: The Flower In Her Hair
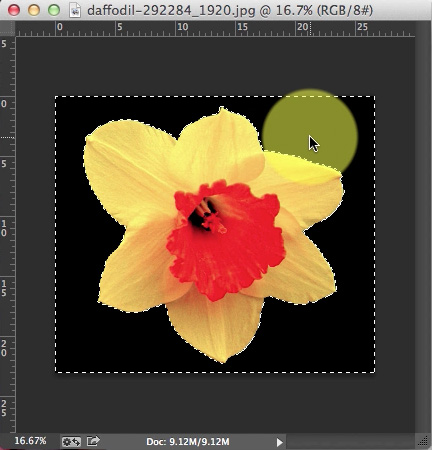
Open the Flower File. Extract the flower using the Magic Wand tool and clicking on the black background.
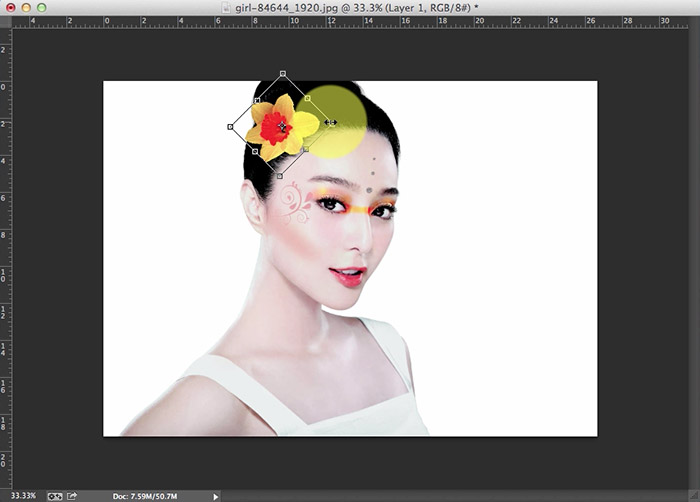
Click and drag it to the main Model file and place it at her temple in her hair. Hold Command + T + Shift and size the flower down if you need to. You will need to rotate the flower to the appropriate angle.
And there you have it. A simple, stylish, and fun digital makeover! The final result is below, with a touch of additional red I decided to add to her lips:
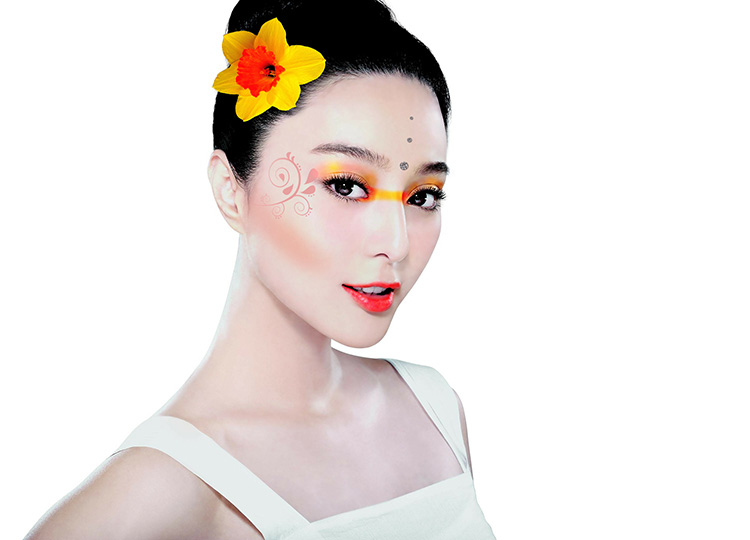
The final result. Boo yah.
The Irony Of It All
Despite having worked at a magazine where I personally worked with models and then retouched their makeup and bodies in Photoshop afterwards, the irony of this tutorial is that I personally rarely wear make up myself (at the time of writing this anyway 🙂 ). However, I’ve been painting physically and digitally for years, so this model’s skin is just another canvas in my eyes.
Let’s look at that before/after comparison again! Woot!